
Introduction to NavWiz 3.2
NavWiz is the operating system that runs on all DF Automation AMRs. It controls all operations including map creation, navigation, task execution, AMR configuration, and a variety of other functions.
NavWiz is built around three core concepts:
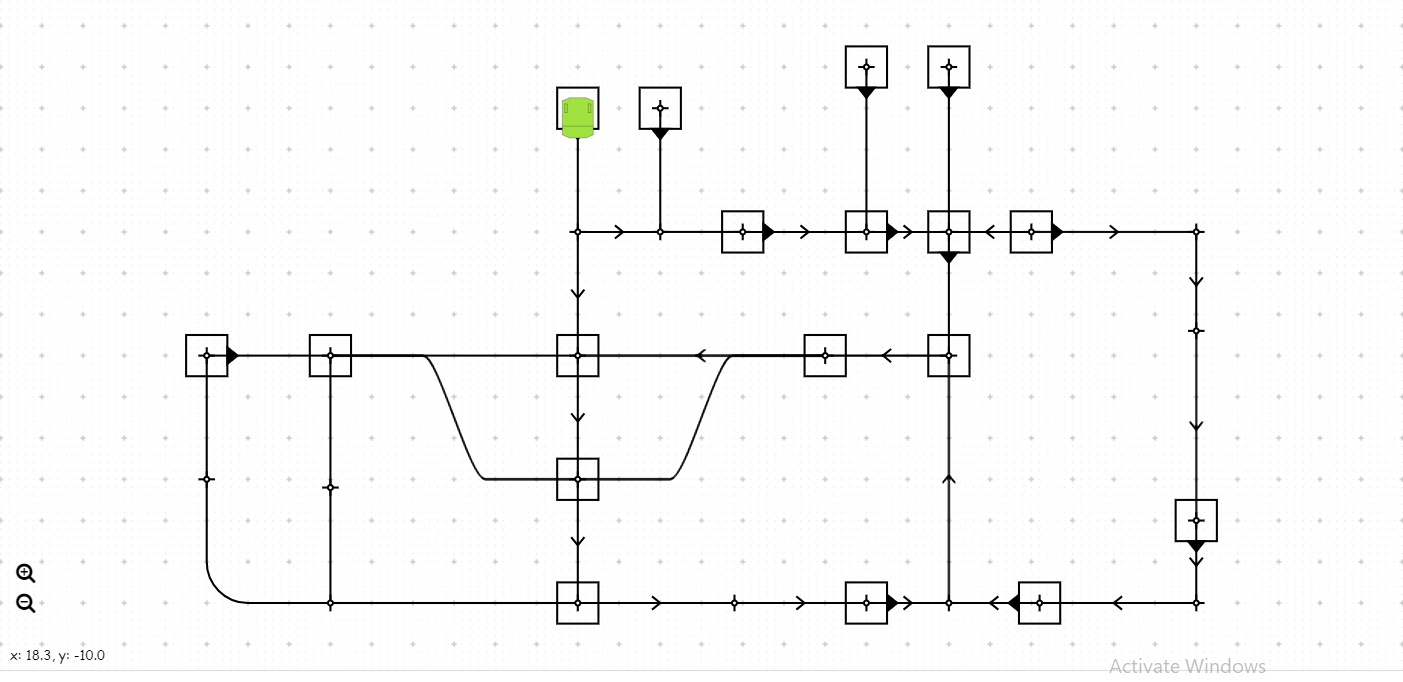
Map — Essential for localization, path planning, and navigation. For magnetic-tape-guided AMRs, users configure paths and stations in the ConfigPanel. For trackless (natural-feature) AMRs, users perform a mapping process to capture the environment's natural features for localization.
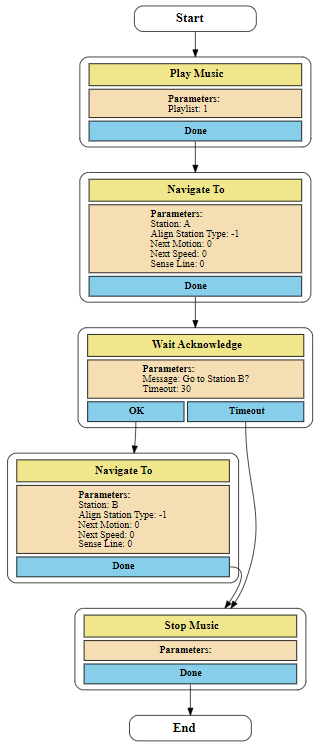
Task Template — A flowchart of actions that defines the AMR's operation sequence. Actions are joined by arrow lines that determine execution flow. For example, a basic task template might: Play Music → Navigate To Station A → Wait Acknowledge (with timeout) → Navigate To Station B → Stop Music.
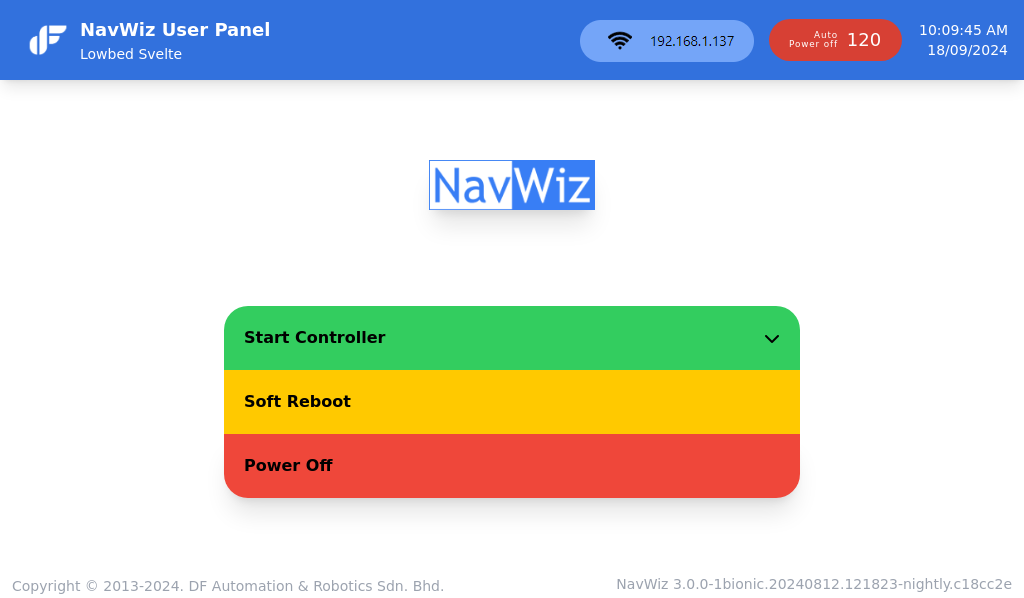
Task Runner — The interface for executing tasks based on configured task templates. After preparing a map and task templates, users start the AGV Controller, initialize the AMR's position, and select tasks to run.
Safety Symbols and Notices
NavWiz uses six safety symbol levels throughout its interface and documentation. It is essential that all instructions and guidance provided in this manual are observed and followed.
| Symbol | Meaning |
|---|---|
| Danger | Indicates an imminently hazardous situation that will result in death or severe personal injury, or major damage to the equipment, if proper precautions are not taken. |
| Warning | Indicates a potentially hazardous situation that could result in death or severe personal injury, or major damage to the equipment, if proper precautions are not taken. |
| Caution | Indicates a situation that could result in minor personal injury or damage to the equipment if proper precautions are not taken. |
| Mandatory | Indicates an action that will result in property damage if not conducted properly. |
| Notice | Indicates a situation that could result in property damage if proper precautions are not taken. |
| Info | Indicates a situation that could result in easier access of certain functions or task completion. |
Getting Started with NavWiz
The following guide provides a basic overview to help you get started with NavWiz. For detailed instructions on each step, refer to the corresponding sections.
- Power On — Turn on the AMR and click on the "Auto power off in xxx seconds" button to extend the auto power-off countdown if needed. Under the boot screen, the AMR Controller must be started within 2 minutes or the AMR will automatically power off.
- Enter Protection Pin — If prompted for a protection pin, use the default pin
123456. - Connect to Wi-Fi — Click on the Wi-Fi icon on the UserPanel and connect the AMR to a Wi-Fi network.
- Access the AMR's Web Interface — Ensure your computer is connected to the same Wi-Fi network. Open a web browser and access the AMR's IP address (e.g.,
192.168.1.59). - Map Creation (Trackless only) — If using the trackless version of NavWiz, generate a map of the environment using the Trackless Map Creator from the boot screen.
- Map Configuration — Go to the Map Editor in the ConfigPanel and configure paths and stations based on your actual environment.
- Task Template Configuration — Go to the Task Template Editor in the ConfigPanel and configure a task template according to your requirements.
- Soft Reboot — Perform a soft reboot of the AMR to apply the changes made to task templates and maps. The soft reboot process takes up to 15 seconds to complete.
- Initialize and Execute Task — Use the Task Runner to initialize the AMR's position and then execute the task.
- Calibration (if required) — If the robot's stopping accuracy needs improvement, perform calibration using the Calibration app (Line Sensor, Motor, or Navigation PID Tuning).
Access Levels and Permissions
NavWiz access levels are divided into four types, each with different permissions:
| Access Level | Description |
|---|---|
| AMR Panel | Direct panel access on the AMR. Can view running/queued tasks and create tasks marked as viewable by AMR Panel. Can be configured with or without pin protection. |
| Call Button | Used for login on NavWiz Call Button devices. Can view running/queued tasks and create tasks assigned to the account. Task assignments are configured by Supervisor accounts. |
| User | Normal login account. Can view running/queued tasks and create assigned tasks. Recommended for terminal displays showing AMR status. |
| Supervisor | Full control of the NavWiz system. Similar to admin accounts, except: cannot update permission lists, edit protected parameters, or restore protected parameters. |
Key permission highlights by category:
| Permission Category | AMR Panel | Call Button | User | Supervisor |
|---|---|---|---|---|
| Start/Stop Controller | Yes (Stop requires pin) | No | Yes | Yes |
| Start/Stop/Pause Task Runner | Yes | No | Yes | Yes |
| Add Task | Yes | Yes | Yes | Yes |
| Use Any Task Template | No | No | No | Yes |
| View ConfigPanel | No | No | No | Yes |
| Change Map/Parameters | No | No | No | Yes |
| Add/Change/Delete Task Template | No | No | No | Yes |
| Manage Webhooks | No | No | No | Yes |
| Backup and Restore | No | No | No | Yes |
| Manage Users | No | No | No | Yes |
| View Log Files | No | No | No | Yes |
| Update Software | No | No | No | Yes |
| Connect/Disconnect Wi-Fi | Yes | No | Yes | Yes |